Spring Boot 애플리케이션을 개발할 때 우리가 가장 먼저 마주하는 코드는 @SpringBootApplication 어노테이션이 붙은 클래스와 그 안의 main 메서드일 것이다.
@SpringBootApplication
public class MyApplication {
    public static void main(String[] args) {
        SpringApplication.run(MyApplication.class, args);
    }
}몇 줄 안되는 매우 간단한 코드지만 SpringApplication.run() 호출 뒤에는 수십 개의 클래스가 협력하여 복잡한 초기화 과정을 수행한다. Spring Boot는 이러한 복잡성을 숨기고 개발자에게 단순한 인터페이스를 제공하지만 내부 동작을 이해 하면 더 효과적으로 Spring Boot를 활용할 수 있다. 이번 포스팅에서는 SpringApplication 객체가 생성될 때 내부적으로 어떤 동작들이 이루어지는지 정리해 보고자 한다.
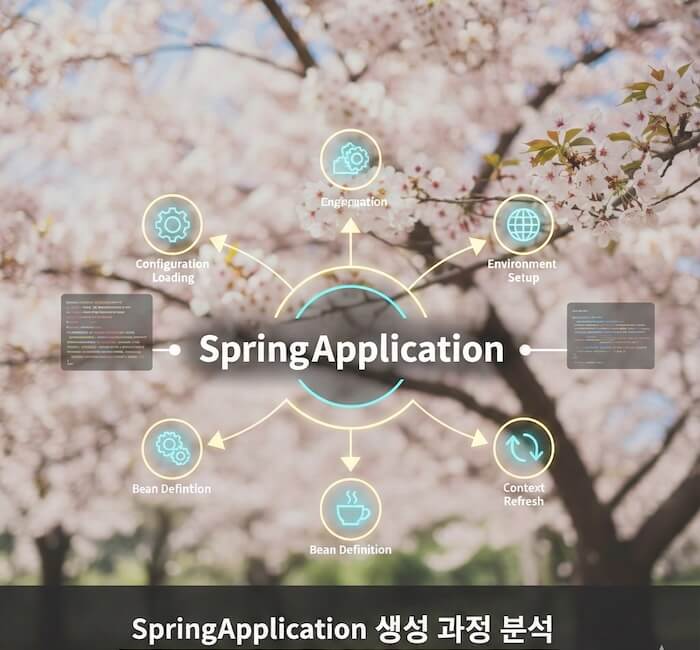
SpringApplication의 역할
SpringApplication 클래스는 Spring Boot 애플리케이션의 부트스트래핑을 담당하는 핵심 클래스다. 이 클래스는 단순히 애플리케이션을 시작하는 것을 넘어서 적절한 ApplicationContext를 생성하고 환경을 구성하고 다양한 리스너들을 관리하는 역할을 수행한다.
SpringApplication 인스턴스가 생성될 때 수행되는 초기화 작업을 살펴보자.
SpringApplication.run(MyApplication.class, args); 코드가 실행되면 내부적으로 다음과 같은 흐름으로 코드가 실행된다.
public static ConfigurableApplicationContext run(Class<?> primarySource, String... args) {
	return run(new Class<?>[] { primarySource }, args);
}

public static ConfigurableApplicationContext run(Class<?>[] primarySources, String[] args) {
	return new SpringApplication(primarySources).run(args);
}

// SpringApplication.run() 실행시 호출되는 생성자
public SpringApplication(Class<?>... primarySources) {
	this(null, primarySources);
}

// SpringApplication.run() 실행시 최종적으로 호출되는 생성자
@SuppressWarnings({ "unchecked", "rawtypes" })
public SpringApplication(ResourceLoader resourceLoader, Class<?>... primarySources) {
  // resourceLoader 인스턴스 설정
	this.resourceLoader = resourceLoader;
	Assert.notNull(primarySources, "PrimarySources must not be null");
	// 메인 클래스 설정
	this.primarySources = new LinkedHashSet<>(Arrays.asList(primarySources));
	// classPath를 통한 WebApplicationType 자동 감지
	this.webApplicationType = WebApplicationType.deduceFromClasspath();
	// BootstrapRegistryInitializer 클래스 로딩
	this.bootstrapRegistryInitializers = new ArrayList<>(
			getSpringFactoriesInstances(BootstrapRegistryInitializer.class));
	// ApplicationContextInitializer 클래스 로딩
	setInitializers((Collection) getSpringFactoriesInstances(ApplicationContextInitializer.class));
	// ApplicationListener 클래스 로딩
	setListeners((Collection) getSpringFactoriesInstances(ApplicationListener.class));
	this.mainApplicationClass = deduceMainApplicationClass();
}SpringApplication.run() 메서드가 호출되면 내부적으로 new SpringApplication(..)을 통해서 객체가 생성된다.
이 때 생성자에서는 다음과 같은 핵심 초기화 작업을 수행한다.
- ResourceLoader및 기본 소스 설정
- 애플리케이션이 사용할 리소스를 읽어올 로더를 설정하고 @SpringBootApplication이 선언된 메인 클래스를 저장하여 이 후 빈 스캐닝의 기점으로 삼는다.
- 기본적으로 SpringApplication.run(…)을 호출한 경우에는 ResourceLoader는 null이 전달된다. 후에 내부적으로 DefaultResourceLoader를 생성하여 사용한다.
- WebApplicationType 자동 감지
- Spring Boot의 가장 큰 장점은 자동 설정이다. 개발자가 별도의 설정을 하지 않아도 Spring Boot는 sspath를 분석해 현재 애플리케이션의 타입을 결정한다.
- SERVLET: DispatcherServlet 클래스가 클래스패스에 있다면 일반적인 Spring MVC 웹 앱으로 구동한다.
- REACTIVE: DispatcherHandler가 있고 서블릿 라이브러리가 없다면 WebFlux 기반의 리액티브 앱으로 구동한다.
- NONE: 위 클래스들이 없다면 웹 서버가 필요없는 일반 자바 애플리케이션으로 구동된다.
- Spring Boot의 가장 큰 장점은 자동 설정이다. 개발자가 별도의 설정을 하지 않아도 Spring Boot는 sspath를 분석해 현재 애플리케이션의 타입을 결정한다.
- 초기화 관련 컴포넌트 로드
- BootstrapRegistryInitializer
- META-INF/spring.factories 에서 BootstrapRegistryInitializer 타입의 구현체들을 찾아서 로딩한다. 해당 구현체들은 부트스트랩 레지스트리 초기화를 위한 컴포넌트들이다.
- ApplicationContextInitializer
- META-INF/spring.factories 에서 ApplicationContextInitializer 타입의 구현체들을 찾아서 로딩한다. 해당 구현체들은 ApplicationContext 초기화를 위한 컴포넌트들을 로드한다.
- ApplicationListener
- META-INF/spring.factories 에서 ApplicationListener 타입의 구현체들을 찾아서 로딩한다. 해당 구현체들은 애플리케이션 이벤트를 수신할 리스너 역할을 한다.
- BootstrapRegistryInitializer
다음은 spring boot 3.2.1 버전의 spring-boot-auto-configure의 spring.factories 파일의 일부다.
# ApplicationContext Initializers
org.springframework.context.ApplicationContextInitializer=\
org.springframework.boot.autoconfigure.SharedMetadataReaderFactoryContextInitializer,\
org.springframework.boot.autoconfigure.logging.ConditionEvaluationReportLoggingListener

# Application Listeners
org.springframework.context.ApplicationListener=\
org.springframework.boot.autoconfigure.BackgroundPreinitializerWebApplicationType 자동 감지 메카니즘 덕분에 spring-boot-starter-web 의존성만 추가해도 자동으로 내장된 톰캣을 통해 웹 서버가 실행된다.
META-INF/spring.factories 파일은 애플리케이션 의존성 라이브러리에 있는 파일을 찾는다.
WebApplicationType 자동 감지
앞서 언급했듯이 Spring Boot는 클래스패스에 존재하는 클래스들을 분석하여 애플리케이션 타입을 자동으로 결정한다.
자동 감지를 수행하는 코드를 살펴보자.
// WebApplicationType 클래스 내부의 상수들
// Servlet 기반 웹 애플리케이션임을 판별하기 위한 최소 조건
// 둘 중에 하나라도 없으면 SERVLET 웹이 아님
private static final String[] SERVLET_INDICATOR_CLASSES = {
    "javax.servlet.Servlet",
    "org.springframework.web.context.ConfigurableWebApplicationContext"
};

// Spring MVC(WebMVC) 존재 여부 판별 클래스
private static final String WEBMVC_INDICATOR_CLASS =
    "org.springframework.web.servlet.DispatcherServlet";

// Spring WebFlux(리액티브 웹) 존재 여부
private static final String WEBFLUX_INDICATOR_CLASS =
    "org.springframework.web.reactive.DispatcherHandler";

// Jersey(JAX-RS) 기반 Servlet 존재 여부
private static final String JERSEY_INDICATOR_CLASS =
    "org.glassfish.jersey.servlet.ServletContainer";

static WebApplicationType deduceFromClasspath() {
    // Reactive 판별, WebFlux 단독인 경우에만 REACTIVE
    // WebFlux는 Servlet 기반과 동시에 존재할 수 있음 (기본은 Servlet)
    if (ClassUtils.isPresent(WEBFLUX_INDICATOR_CLASS, null)
        && !ClassUtils.isPresent(WEBMVC_INDICATOR_CLASS, null)
        && !ClassUtils.isPresent(JERSEY_INDICATOR_CLASS, null)) {
        return WebApplicationType.REACTIVE;
    }
    for (String className : SERVLET_INDICATOR_CLASSES) {
        if (!ClassUtils.isPresent(className, null)) {
            return WebApplicationType.NONE;
        }
    }
    return WebApplicationType.SERVLET;
}위 코드는 클래스패스에 어떤 웹 기술이 존재하는지로 타입을 판단한다.
WebFlux(리액티브웹)의 경우 Servlet과 동시에 존재할 수 있는데 동시에 존재하는 경우 타입은 SERVLET가 된다.
- SERVLET: 전통적인 서블릿 기반 웹 애플리케이션
- spring-boot-starter-web 의존성이 있을 때
- DispatcherServlet 기반
- REACTIVE: 리액티브 웹 애플리케이션
- spring-boot-starter-webflux 의존성이 있을 때
- Spring WebFlux 기반
- NONE: 웹이 아닌 일반 애플리케이션
- 웹 관련 의존성이 없을 때
- 배치 애플리케이션, CLI 애플리케이션 등
ApplicationContextInitializer와 ApplicationListener 등록
Spring Boot는 META-INF/spring.factories 파일을 통해 다양한 초기화 컴포넌트들을 자동으로 등록한다.
private <T> List<T> getSpringFactoriesInstances(Class<T> type) {
    return getSpringFactoriesInstances(type, null);
}

private <T> List<T> getSpringFactoriesInstances(Class<T> type, ArgumentResolver argumentResolver) {
    return SpringFactoriesLoader.forDefaultResourceLocation(getClassLoader()).load(type, argumentResolver);
}Spring Boot 3.X의 SpringFactoriesLoader 변화
Spring Boot 3.X에서는 SpringFactoriesLoader의 사용 방식이 개선되었다.
- 기존 방식(2.X): SpringFactoriesLoader.loadFactoryNames() + 수동 인스턴스 생성
- 새로운 방식(3.X): SpringFactoriesLoader.forDefaultResourceLocation().load() 직접 호출
주요 개선 사항
- fluent API 스타일: forDefaultResourceLocation(classLoader).load(type, argumentResolver) 형태로 메서드 체이닝을 사용한다.
- ArgumentResolver 지원: 생성자 파라미터 해결을 위한 ArgumentResolver 추가 지원한다.
- 타입 안정성 강화: 제네릭을 통한 컴파일 타임 타입 체크
- 성능 최적화: 내부적으로 캐싱과 인스턴스 생성 과정이 최적화 되었다.
ApplicationContextInitializer의 역할
- ApplicationContext가 refresh 되기 전에 추가적인 초기화 작업 수행
- PropertySource 추가, 프로파일 활성화, Bean 정의 후처리 등
- 예: ConfigurationWarningsApplicationContextInitializer, ContextIdApplicationContextInitializer
ApplicationListener의 역할
- 애플리케이션 시작 과정의 다양한 이벤트를 수신하여 로깅, 모니터링, 커스텀 초기화 로직 실행
- 예: LoggingApplicationListener, BackgroundPreinitializer, DelegatingApplicationListener
BootstrapRegistryInitializer의 역할
- ApplicationContext 생성 이전 단계에서 필요한 서비스들을 BootstrapRegistry에 등록
- 초기 설정이나 외부 시스템 연결등 부트스트랩 단계에서 필요한 작업 수행
SpringApplication 주요 public 메서드
SpringApplication.run() 정적 메서드 호출로 기본적인 셋팅을 할 수 있지만 SpringApplication 인스턴스를 직접 생성하여 다양한 public 메서드를 통해 구동 환경을 세밀하게 조정할 수 있다.
| 메서드 | 설명 | 디폴트 |
| setWebApplicationType | Classpath 기반의 자동 감지 대신 애플리케이션 타입을 강제로 지정한다. (SERVLET, REACTIVE, NONE) | 자동감지 |
| setBannerMode | 시작시 출력되는 배너의 형태를 설정한다. (CONSOLE, LOG, OFF) | CONSOLE |
| setAdditionalProfiles | 코드 레벨에서 활성화할 프로파일을 추가한다. | 없음 |
| setLazyInitialization | 빈(Bean)들을 필요한 시점에 생성하도록 지연 초기화 여부를 설정한다. | false |
| addListeners | 특정 구동 단계에서 동작할 커스텀 리스너를 추가한다. | |
| run(String… args) | 설정을 마친 후 실제 애플리케이션을 구동하는 핵심 메서드다. | |
| setRegisterShutdownHook | JVM 종료시 Spring 컨텍스트가 안전하게 닫히도록 셧다운 훅을 자동으로 등록한다. | true |
| setLogStartupInfo | 시작시 메인클래스 이름, 프로파일 정보, 구동 시간등을 로그로 출력한다. | true |
| setHeadless | 서버 환경을 고려하여 java.awt.headless 프로퍼티를 true로 자동 설정한다. | true |
| addInitializers(…) | ApplicationContextInitializer를 직접 추가 한다. Custom하게 작성한 ApplicaltionContextInitializer를 손쉽게 추가할 수 있다. |
WebApplicationType 직접 지정이 필요한 경우
대부분은 자동감지를 통해서 사용하겠지만 경우에 따라서 직접 지정이 필요한 경우가 있다.
1. 라이브러리 충돌 상황: 프로젝트에 spring-boot-starter-web과 spring-boot-starter-webflux가 동시에 포함되어 있는 경우 Spring Boot는 기본적으로 SERVLET 타입을 우선하지만 WebFlux로 돌리고 싶다면 직접 지정해야 한다.
2. 웹 환경 제외(Test/Batch): 웹 관련 라이브러리는 포함되어 있지만 특정 실행 환경(예: 데이터 마이그레이션 툴, 로컬 배치 작업)에서는 서버를 띄우고 싶지 않을 때 WebApplicationType.NONE으로 강제할 수 있다.
3. 하이브리드 구성: 하나의 프로세스 내에서 웹 서버를 띄우는 컨텍스트와 백그라운드 작업을 수행하는 비웹(NONE) 컨텍스트를 부모-자식 관계로 묶어서 실행하는 특수한 대규모 애플리케이션 구성시 사용한다.
사용법은 다음과 같다.
@SpringBootApplication
public class AdvancedConfigApplication {

    public static void main(String[] args) {
        SpringApplication app = new SpringApplication(AdvancedConfigApplication.class);

        // 셧다운 훅 활성화 (기본값이 true이지만 명시적으로 제어 가능)
        // 컨텍스트 종료 시 리소스 정리를 보장한다.
        app.setRegisterShutdownHook(true);

        // 시작 정보 로그 출력 비활성화
        // 시작 시간이나 프로파일 정보가 로그에 남지 않도록 한다.
        app.setLogStartupInfo(false);

        // 3. 헤드리스 모드 비활성화
        // 만약 서버에서 GUI 관련 라이브러리(그래프 생성 등)를 직접 사용해야 한다면 false로 설정한다.
        app.setHeadless(false);

        // 웹 환경이 필요 없는 배치성 애플리케이션일 경우 강제 지정
        app.setWebApplicationType(WebApplicationType.NONE);

        // 배너를 끄고 로그로만 확인하고 싶을 때
        app.setBannerMode(Banner.Mode.OFF);

        // 특정 프로파일(예: 'performance')을 프로그래밍 방식으로 추가
        app.setAdditionalProfiles("performance");

        // 시작 시간 단축을 위해 지연 초기화(Lazy Initialization) 활성화
        app.setLazyInitialization(true);

        // 수동으로 초기화 객체 추가
        // ApplicationContext가 refresh되기 전에 특정 설정을 주입합니다.
        // app.addInitializers(new MyCustomInitializer());

        // 애플리케이션 이름 설정 (Spring Boot 3.x 가시성 향상)
        // 로그나 메트릭에서 식별자로 사용됩니다.
        // app.setMainApplicationClass(AdvancedConfigApplication.class);

        app.run(args);
    }
}지금까지 SpringApplication 인스턴스가 생성될 때의 동작과 WebApplicationType 자동감지가 어떻게 이루어지는지 살펴봤다.
- 클래스패스 기반의 WebApplicationType 자동 감지
- 모든 의존성 라이브러리의 META-INF/spring.factories 로부터 애플리케이션 구동을 위한 초기화 클래스들을 로딩한다.
- BootstrapRegistryInitializer 타입 클래스 로딩
- ApplicationContextInitializer 타입 클래스 로딩
- ApplicationListener 타입 클래스 로딩
다음 포스팅에서는 SpringApplication 인스턴스의 run() 메서드 동작을 정리해보도록 하겠다.
다음에 보면 좋은 포스팅
Spring Boot – Application Bootstraping을 위한 13단계